North Redwoods Book Arts Guild

If you are interested in more info or joining, please email to no.redwoods.bag@gmail.com

Monday, June 26, 2023

SEWN BOARDS BINDING WITH SEWN-IN WRAPPER

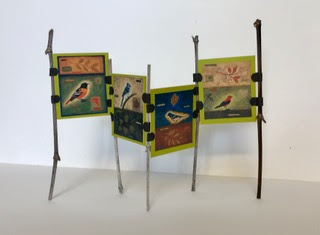
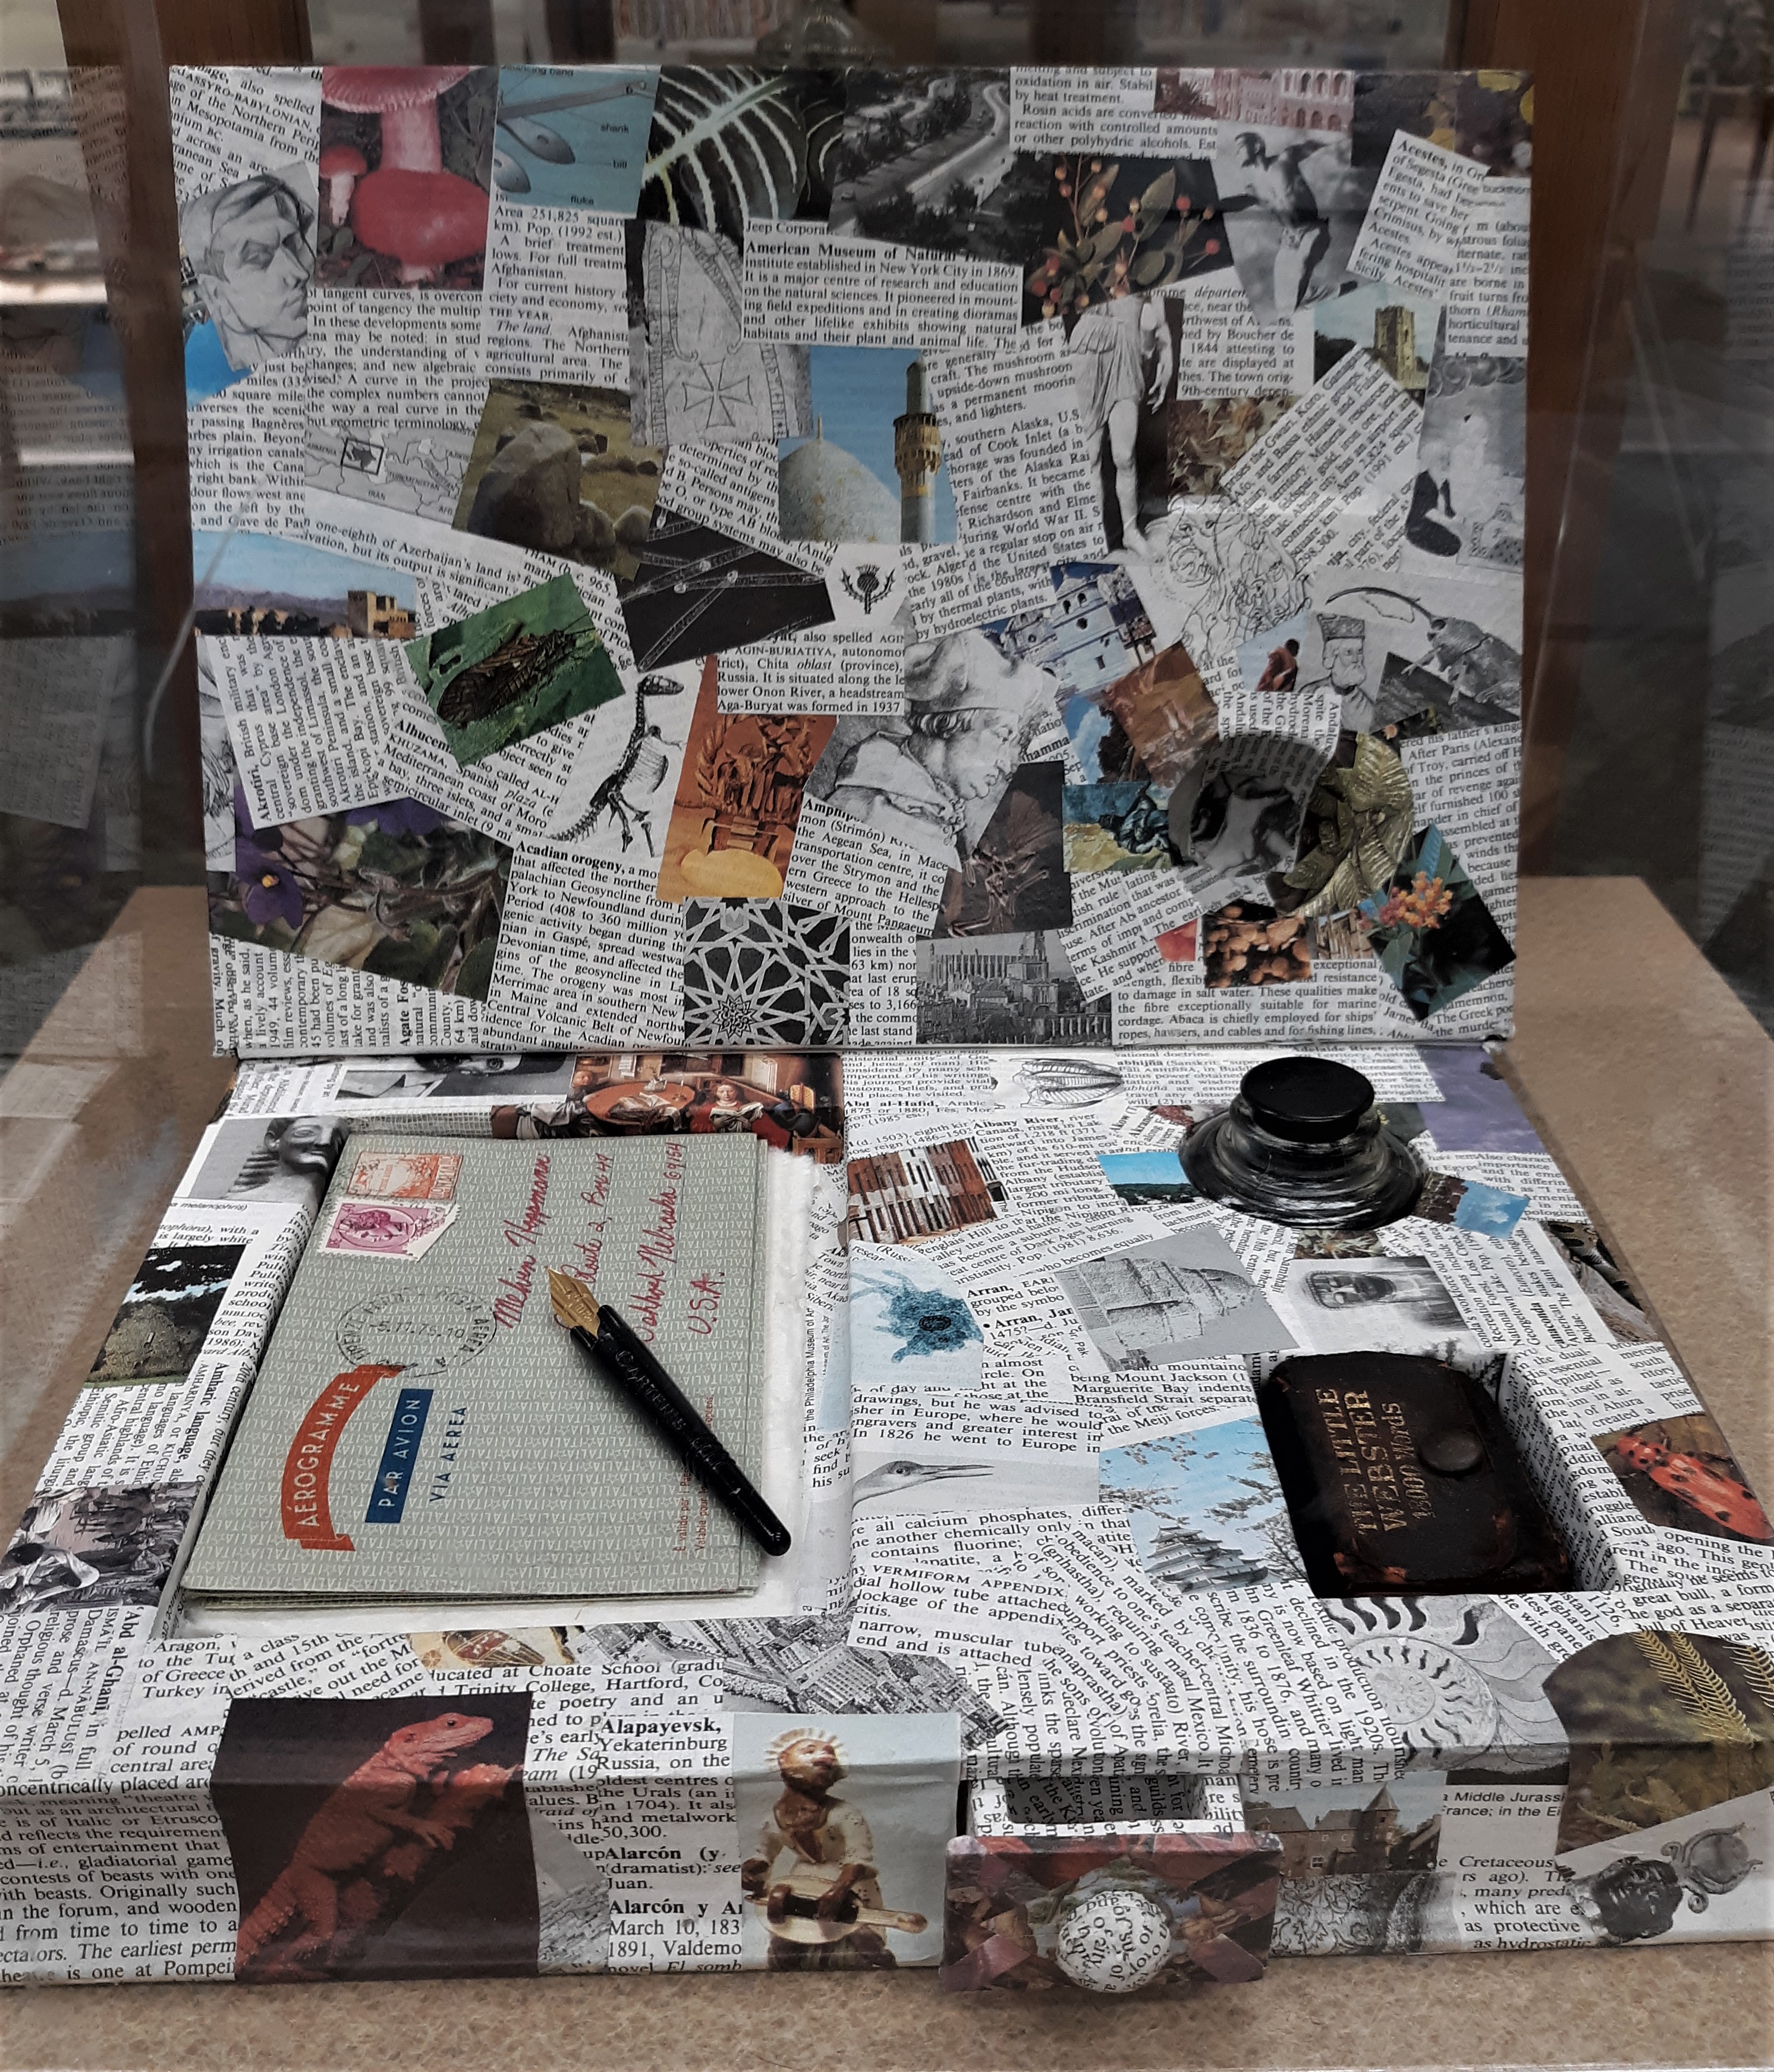
 This variation of the Sewn Boards Binding is a quick method of creating a book with a wraparound cover. Our instructor, Celeste Chalasani, will show us how the wrapper can unfold as a wide panorama, presenting book arts possibilities. The text block can be made of either text weight paper to create a blank journal or cardstock with pages inside the book that can hold your artwork.


 Materials Required

  • 8-1/2" x 5-1/2" sized text weight paper for the signatures (32 sheets) to create a blank journal OR 8 (eight) pages of 8-1/2" x 5-1/2" cardstock if you would like to create a book with pages that can be decorated. NOTE: Please fold the 32 sheets of text paper into eight sections of four sheets OR each of the eight pages of cardstock into singular pages before class.
  • 2 (two) pieces of 8-1/2" x 5-1/2" cardstock for the outer folios
  • 19" x 5-1/2" Heavy paper (Canson Colorline, Mi-Teintes, or Fabriano Tiziano). Note: Any artistic work for the wrapper must be done before the book is constructed. The height of this paper can be adjusted if you want to make sure the text block doesn't show.
  • 1" x 5-1/2" Hahnemuhle Bugra or rice paper for the spine lining. If these are not available you can substitute lightweight decorative paper.
  • Needle and 2 yards waxed linen thread for sewing the signatures
  • PVA glue
  • 3" x 5-1/2" cardstock for creating a punching template

Tools Needed

  • Bone folder
  • Awl
  • Punching cradle
  • Glue brush
  • Cutting mat
  • Metal ruler or straight edge
  • X-acto knife
  • Scissors
  • Gluing up boards
  • Ruler


Another example of how the cover wraps around the book.

When:   Saturday July 8 at 10 a.m. PDT
Where:  On your computer, tablet or smartphone via Zoom
RSVP:    Dolores Guffey by July 3 to receive the password
Workshop Questions: Celeste Chalasani
Zoom Questions: Bobbie Hayes
Contact information for everyone is in the newsletter

Bonnie Halfpenny presents a challenge for our September exchange


The trouble with starting things is that eventually you need to finish them!  or make a painful decision to discard the leftovers.  Every September, NORBAG reaches out and gives us the opportunity to get some unfinished project off the shelf, and out into the world.  The image below is one of my unfinished pieces (I think “clothing” was the theme).  Let’s face it- most unfinished works happen because we either run out of time or get stumped at a particular spot.  Maybe it was too elaborate of an idea to start with.  No matter- looked at with fresh eyes, an answer is usually found and finishing a long-standing problem is doubly satisfying.  

Will we see this finished in the upcoming 
September exchange?

If you would like to share stories about any of your unfinished projects (or ones that have now been completed), please send the information and/or photos to Bonnie Halfpenny. bhalfpen@gmail.com

Monday, June 12, 2023

WORKSHOP PHOTOS & TOOLS

Members who attended our past two workshops have produced some wonderful books and cards that we would like to share. In May, Edge Gerring taught us how to make stilt books. These were wildly popular and members have come up with even more materials to use to create these structures. Here is a sampling of some of their books.

This is the stilt book Edge made while teaching the workshop.

Cheri Aldrich used her eco-dyed papers.

Margaret Beech

Michele Kamprath

Sherril Story

This is the back side of Sherril's book.

Emmy Nelson used her beautiful wet cyanotype prints.

Paper beads, 6 strand waxed linen thread,
& twigs from the garden complete
Emmy's very organic book.


Thank you Edge for introducing us to this great structure!


For our June workshop Kenzie Mullen taught us how to make an elegant pop-up card that could be expanded to make a multi-page book. Kenzie learned how to make this structure from one of our Alaskan members, Margo Klass, at the Newport Paper & Book Art Festival. Here are some examples of the cards made at the workshop. 


Beth McIlraith

Sherril Story's card cover

The inside of Sherril's card.

Margaret Beech

Margaret Beech

Mary Conley made a beautiful winter scene card.

Emmy Nelson used a whole sheet of her beautiful
cyanotype paper for her cards.

Emmy has been VERY busy making these gorgeous cards.


Thank you Kenzie for sharing this versatile structure.


This month we will introduce another contributor to this blog. One of our members from Portland, Oregon, Bonnie Halfpenny, will be sharing some of her book art ideas as well as proposing some questions for our readers. 

Everyone has their favorite tools, and I would have a hard time just choosing one.  (When my grandson was young, he couldn't live without his Tigger which doubled as a pacifier).  While I am not as attached to it as he was to his tool, I would often be quite lost without the Dritz Fine Point Disappearing Ink Pen, which is both air and water soluble.  Although made for fabrics, I have used this pen on printer paper, both cold & hot press watercolor, mulberry papers, cardstock, and Unryu and it has evaporated without a trace after a couple of days, or sooner.  Of course, I test it out first on new material, to be sure.  It is sold online and in fabric stores.


What are your favorite tools?  We'd love to know!  Please send your ideas to bhalfpen@gmail.com


Monday, May 29, 2023

ORIGAMI SCREEN STRUCTURE

At the June workshop Kenzie Mullen will teach us how to make an Origami Screen Structure that was designed by Margo Klass. This is a great structure to display beautiful photographs or art work.

Sunday, May 14, 2023

NEWPORT PAPER & BOOK ARTS FESTIVAL

The 2023 Newport Paper & Book Arts Festival (NPBAF) was held April 13-15 in Newport, Oregon. Of the almost 100 attendees, 21 were members of NORBAG. We were lucky to experience beautiful sunny (but still chilly) weather for all three days. Seven instructors taught 11 different classes that included book and box making, paper embellishment & marbling, animated pop-ups, and using different plant matter for inks and dyes. The Instructor's Exhibition and talks by some of the instructors were very inspiring. It's not too early to start thinking about next years festival which will take place over three days between April 11-14, 2024. For more information contact Sara at ssiggelkow@coastarts.org.

Here are some photographs from the festival. The first group of photos are from the Instructor's Exhibition at the Visual Arts Center.

Margo Klass - Solstice Moon, Unfolding Box Book

Connie Stricks - Birch Journal

Connie Stricks 


Randi Parkhurst - Rainbow Boxes

Moe Snyder - Three Tiers

Moe Snyder - Picture This

Some of the instructors and local artists shared their work at one of the evening events.

Shawn Sheehy

Shawn taught the animated pop-up classes

One page from Shawn's Fresh Cut Xmas book


The Popbox Cabinet


Cheri Aldrich is a NORBAG member from Newport who also had an exhibit at the Visual Arts Center during the festival.


Cheri described some of her pieces
 in her - It's Just My Nature exhibit

Another view of Cheri's wonderful creations

The following photographs are from one of the classes and also include some of the items made by class participants.

Busy making pop-ups

Shawn Sheehy's Pop-up class

Bonnie Julien took both of Shawn's classes


Three days of classes = two books of pop-ups

Dolores Guffey's beautiful dragonfly display box 
made in Margo Klass' workshop.


Monday, May 1, 2023

STILT BOOKS

Our May workshop will be taught by Edge Gerring. This will be a very different structure for us, but it should be great fun to make. Edge uses the term, stilt, for books that are mounted on sticks. The sticks, or stilts, can be any material from natural branches, dowels, skewers, popsicle sticks to blown glass, chopsticks, or straws! This class will introduce you to a variety of ways to mount panels on sticks with show and tell presentation. Then we will make a stilt book!

This is the size Stilt Book we will make.

The other photos show different sizes and ways to attach the panels to the stilts.


Tools:

  • PVA (or other white glue) and toothpick
  • Waxed embroidery floss, waxed thread, etc. for tying the panels to the stilts
  • Scissors and awl or very small hole punch (1.0-1.5 mm screw punch)
  • A piece of thick paper to make a hole punching template
  • Pencil
  • A needle with an eye that will accommodate the thread you are using
  • A small weight is helpful, but not required to hold things down while you tie knots
  • Optional: a straight edge and clamps to make a bumper at the edge of your work surface. This is helpful in making sure all the stick bottoms are lined up with each other.

Materials:

  • Four (4) panels of heavy card stock, playing cards or thin cardboard 3-1/2" high by 2-1/2" wide. You can use a larger (or smaller) size, as you wish, square or rectangular
  • Decorate your panels before class, or use them plain and this can be a prototype
  • Five (5) sticks (Edge will be using thin skewers that are 6" long. The length of yours is up to you, but they should be at least 2" longer than the height of your panels.
  • Beads or other decorative stuff if desired


When:
   Saturday May 13 at 10 a.m. PDT

Where:  On your computer, tablet or smartphone via Zoom

RSVP:   To Dolores Guffey by May 8 to receive the password

Workshop Questions: Edge Gerring

Zoom Questions:  Bobbie Hayes

Contact information for everyone is in the newsletter

Monday, April 10, 2023

ROOMS, SCRIBES AND SCRIBBLES

Many thanks to Diane Williams who taught us a very clever and adaptable one page structure at our April workshop. If you enjoy decorating rooms, like for a dollhouse, then this structure is for you! All you need to get started is a square piece of paper that you fold into 16 even squares and you're halfway there. Of course you don't have to use the four spaces as "rooms", but many of us were intrigued by how Dolores Guffey decorated hers using photographs of dollhouse rooms. Here are photographs of her "rooms".

Dolores did not glue her "rooms" together
so that they could also be displayed in an
accordion orientation.

The kitchen

The Living Room

The bathroom

The bedroom

The structure can still be arranged together for display.


If you would rather not decorate your structure as "rooms", here is an example from Margaret Beech.

Margaret also left her book in accordion format
so that it
 can be displayed different ways.

Scripts, Scribes & Scribbles

Those of us who live in the Pacific Northwest are very lucky that book art and other endeavors relating to the making and sharing of books and zines is so prevalent. There are multiple book art organizations, museums and libraries with wonderful collections and various exhibitions showcasing the art. One can almost always find an exhibit to visit.

Currently, until April 26th, Scripts, Scribes & Scribbles is on display at Collins Memorial Library on the campus of the University of Puget Sound. This exhibit "brings together examples of handwriting and illustrates how handwriting has been taught, reproduced, and reimagined over the past five hundred years. Displaying a range of books and manuscripts from the Collins Memorial Library collection and many private donors and collectors, the exhibition makes the role of handwriting in the age of print, newly legible.

The exhibit also includes artifacts and tools used in the act of writing, including a central part of the exhibition, a 19th century ladies writing desk (Bonheur du jour), inkwells, pens, quills and much more."

Here are a few photographs from the exhibition.


Changes by Bonnie Larson

Pocketbook by Nancy Brones.
 This book was sized to fit into a typical pocket
 of a women from the 18th century. The text is
 from the nursery rhyme "Lucy Locket".