North Redwoods Book Arts Guild

If you are interested in more info or joining, please email to no.redwoods.bag@gmail.com

Tuesday, September 12, 2023

RADIAL HINGE BOOK & BIMA

Our September workshop, taught by Kit Davey, provided us with a completely new structure to play with. This circular book, with pages that rotated 360 degrees, was easy to make once we were taught how the hinges work. NORBAG members can view the recording of this workshop and anyone else interested in this structure can check out Kit's website at  https://www.found-object-art.com/, to see if she might teach it again. It will be fun to see if our members use this structure in future book exchanges. Here are a few examples from the workshop.


Mary Conley

Edge Gerring

Bonnie Julien


Thank you Kit for showing us a new structure to play with.


Currently on display in the Sherry Grover gallery at the Bainbridge Island Museum of Art (BIMA) in Washington is "Sound Stories: Group Exhibition of Artists' Books".  This exhibit will run through September 24. The following photos are a small sample of the books in the exhibition.


Lucia Harrison
Consider What's Lost II

Mare Blocker
Accordion Queen

An Gates
Leonardo da Vinci's Platonic Solids

Debbi Commodore
Take a Moment

Deborah Greenwood
The Land


Monday, August 28, 2023

CIRCULAR BOOK WITH RADIAL HINGES

 Our September workshop will be taught by our member from the San Francisco Bay Area, Kit Davey. On her website at
https://www.found-object-art.com, it says Kit "makes playful art to spread delight across the planet". You'll find this to be true if you visit her website or her Instagram page @daveykit and check out all the whimsical and beautiful books that she makes. She'll be teaching us a circular book with pages that rotate 360 degrees because of unique "hinges" installed on the back. She'll also teach us an unusual case for the book.


Tools Needed:

  • 3/4" and 1" circular paper punches. You cannot make the book without them!
  • Pencil with eraser
  • Ruler
  • Exacto knife and cutting mat
  • Liquid glue, such as PVA, Modge Podge, mat medium, Elmer's or Yes Glue
  • Paintbrushes 1/4" or so wide
  • Jar for water
  • Circle cutter, if you have one
  • Small hole punch (1/8" in diameter) or use an awl to make a small hole
  • Small brad (with a head approximately 1/4" in diameter or whatever size you have available)


Materials Instructions:


Important note: You MUST cut out the materials in advance of this workshop! There will not be time to cut things during the Zoom meeting.

Double-sided cardstock or mixed media weight paper will work well for all the elements in this book. Some scrapbooking papers are also stiff enough. Flimsy paper, like magazine pages, dictionary pages or map pages are NOT stiff enough.

  • For the pages: six (6) circles made from single-sided or double-sided cardstock, 3" to 3 3/4" in diameter. You can use a glass or something round to trace a circle if you don't have a circle cutter.
  • For the radial hinges that will be on the back of a six-page book: 24 3/4" circles and six (6) 1" circles.
  • You can embellish the circular book pages before or after class, as we won't have time in class for this.
  • For the case: two (2) pieces of cardstock, 4 1/4" by 8" and one small brad. 

When:    Saturday September 9 at 10 a.m. PDT
Where:  On your computer, tablet or smartphone via Zoom
RSVP:    By September 4 to Dolores Guffey to receive the password
Workshop Questions:  Kit Davey (kitdavey@aol.com)
Zoom Questions:  Bobbie Hayes
Contact information for Dolores and Bobbie is in the newsletter.

Tuesday, August 15, 2023

SINGLE PAGE POCKET BOOK & MORE

 Our August workshop, taught by Emmy Nelson, was great fun. Not only was this a quick and easy structure to make, but we discovered multiple ways to personalize it. Here's one variation of the structure (see the previous post for the originals).

Bonnie Julien added decorative paper 
behind some pages with a pamphlet stitch
to keep the pages aligned.

She also added a single stitch to keep the pockets closed.

Thank you Emmy for an excellent workshop.


This month's featured artist in the kiosk at the Humboldt County Library is Lynne Gurnee.  If you're in Eureka, be sure to check out this great display.


Thank you Kenzie Mullen for arranging this display.

Notes from the Art Lab 

by Bonnie Halfpenny

The Treasure Chest

In a recent NORBAG newsletter, there was a mention of public domain sites listed by Bel Mills at Scrap Paper Circus. Maybe you are very familiar with these websites, but I was not. Now that I've peeked into them, I realize I was missing a real treasure chest! Some of the great sites mentioned include Old Book Illustrations at https://www.oldbookillustrations.com which covers everything from plants to individual illustrators. Next head to Vintage Ephemera when you need that look at https://vintageephemera.blogspot.com.This site has an extensive subject listing, so you don't have to look through so many things to find something useful.

Over the years, the Smithsonian has been collecting everything they deem important; now they are busy removing copyright restrictions from their digital images. Smithsonian Open Access lets you in at https://www.si.edu/openaccess.

The Biodiversity Heritage Library has over 100,000 images available to download at https://www.flickr.com/photos/biodivlibrary/sets/.

While I have received emails promoting The Public Domain Review, I had never taken a serious look at this site. Browsing there is well worth your time, at

I'd like to thank Bel Mills at https://www.scrappapercircus.com/ for making this information available. For these and all public domain websites, please take note of any caveats they may list. And if you have a favorite public domain site to share, please let us know through the blog. Happy browsing!


Monday, July 31, 2023

SINGLE PAGE BOOK WITH POCKETS

 This clever little book is made from a single sheet of paper. It's a wonderful structure that can easily be enlarged, reduced, or even changed in configuration depending upon how you fold and/or cut it. The version pictured below will be taught by Mary Elizabeth Nelson (aka Emmy). Emmy suggests that you first print out the PDF on regular copy paper in black and white to make a mock up during the workshop. Afterwards you can print it on better paper in color. After you RSVP for this workshop you'll receive the pdf to make the book shown below.

Emmy's beautiful calligraphy is featured
on this friendship book.


Tools Needed:

  • Black & white printout of Emmy's pdf design
  • Cutting mat
  • C-THRU gridded ruler 2" x 18" or 2" x 12"
  • Bone folder
  • Pencil with eraser
  • X-Acto knife
  • Scoring tool

Here are more photos of the structure using different paper/designs.

In these examples plain paper is used for the book
 with different papers placed in the pockets.


When:    Saturday August 12 at 10 a.m. PDT
Where:   On your computer, tablet or smartphone via Zoom
RSVP:     Dolores Guffey by August 7
Workshop Questions:  Mary Elizabeth Nelson
Zoom Questions:  Bobbie Hayes
Contact information for everyone is in the newsletter


Monday, July 17, 2023

NOTES FROM THE ART LAB


What’s in a Name?

Maybe because the space where I make my art has changed over the years from the kitchen table to the extra bedroom to the downstairs tv room to an actual dedicated space, I have never been comfortable calling it my art studio.  My immediate response is to associate “art studio” with paints and an easel.  Then, the word “studio” sounds a bit close to the word “study” and “studious”, and according to the Oxford English Dictionary, they all come from the Latin studium.  Maybe I am too literal minded about this, but I don’t feel I “study” art in a “studio”; I feel I do my best to create it.  I might study art in a museum or even a gallery, online or in classes.  If I am ambitious, I may create a maquette, or a sketchbook before I produce the artwork; but that is not the same.  

So, over the years I have heard the process of creating art described as an attempt at alchemy-turning base materials into gold- and alchemists worked in laboratories.  Oddly enough, the word studio does not show up in print until 1785 and seems to be associated with the idea of creating a “study” for the actual piece.  Laboratory appeared in print from the 1580’s onward, as the place where alchemists work.  The current definition for laboratory is “a place for providing opportunity for experimentation, observation, or practice in a field of study”.  As this comes closer to the way I work, I feel comfortable referring to the space where I now work as my Art Lab. 

This is not to say that if you’ve been comfortable calling your space an art studio, you shouldn’t do that!  I am just sharing my thoughts about what my space means to me and why.  Your thoughts?  Does anyone use other terms for that place where you work your magic?  Please send any responses to www.norbag.blogspot.com or to bhalfpen@gmail.com

We've been looking for a special "heading" to use for Bonnie's articles and have decided Notes from the Art Lab by Bonnie Halfpenny is the winner. 

Monday, July 10, 2023

LIBRARY KIOSK & MISCELLANEOUS

 Our July workshop of Sewn Boards Binding with Sewn-in Wrapper taught by Celeste Chalasani was very well presented and attended! Thank you Celeste for showing us a different way to bind a book block that also showcases the cover. The book shown below was made by Sherrill Story.


This book was made by Michele Kamprath


Thanks go to Kenzie Mullen for creating the book exhibits in the kiosk inside the Humboldt County Library in Eureka, California. The latest exhibit showcased exchange books made by Bonnie Julien.


Here is a new challenge from Bonnie Halfpenny...


Try to Remember!


Here is a challenge- can you remember how you first became aware of book arts? I was trying to figure this out for myself. It certainly wasn't from seeing them in a museum! It wasn't from finding a great discussion of them in a book. It wasn't from hearing about them in any art class. I do know I saw an exciting exhibit of them about 25 years ago at the Athenaeum Music & Arts Library in La Jolla, CA, where we happened to be vacationing (escaping Phoenix heat). I remember I was impressed by the variety of book forms and media used. That institution now has a collection of more than 2200 artists' books if you are ever down that way.

But, back to the question! Maybe some of you were lucky enough to be taking art classes where they had book arts on offer, but that didn't happen for me. It would be interesting to hear the various ways that you became aware of this field. So give your brain a workout and let us know how and when this fertile field opened for you. Send your responses to me at bhalfpen@gmail.com or no.redwoods.bag@gmail.com.


Monday, June 26, 2023

SEWN BOARDS BINDING WITH SEWN-IN WRAPPER

 This variation of the Sewn Boards Binding is a quick method of creating a book with a wraparound cover. Our instructor, Celeste Chalasani, will show us how the wrapper can unfold as a wide panorama, presenting book arts possibilities. The text block can be made of either text weight paper to create a blank journal or cardstock with pages inside the book that can hold your artwork.


 Materials Required

  • 8-1/2" x 5-1/2" sized text weight paper for the signatures (32 sheets) to create a blank journal OR 8 (eight) pages of 8-1/2" x 5-1/2" cardstock if you would like to create a book with pages that can be decorated. NOTE: Please fold the 32 sheets of text paper into eight sections of four sheets OR each of the eight pages of cardstock into singular pages before class.
  • 2 (two) pieces of 8-1/2" x 5-1/2" cardstock for the outer folios
  • 19" x 5-1/2" Heavy paper (Canson Colorline, Mi-Teintes, or Fabriano Tiziano). Note: Any artistic work for the wrapper must be done before the book is constructed. The height of this paper can be adjusted if you want to make sure the text block doesn't show.
  • 1" x 5-1/2" Hahnemuhle Bugra or rice paper for the spine lining. If these are not available you can substitute lightweight decorative paper.
  • Needle and 2 yards waxed linen thread for sewing the signatures
  • PVA glue
  • 3" x 5-1/2" cardstock for creating a punching template

Tools Needed

  • Bone folder
  • Awl
  • Punching cradle
  • Glue brush
  • Cutting mat
  • Metal ruler or straight edge
  • X-acto knife
  • Scissors
  • Gluing up boards
  • Ruler


Another example of how the cover wraps around the book.

When:   Saturday July 8 at 10 a.m. PDT
Where:  On your computer, tablet or smartphone via Zoom
RSVP:    Dolores Guffey by July 3 to receive the password
Workshop Questions: Celeste Chalasani
Zoom Questions: Bobbie Hayes
Contact information for everyone is in the newsletter

Bonnie Halfpenny presents a challenge for our September exchange


The trouble with starting things is that eventually you need to finish them!  or make a painful decision to discard the leftovers.  Every September, NORBAG reaches out and gives us the opportunity to get some unfinished project off the shelf, and out into the world.  The image below is one of my unfinished pieces (I think “clothing” was the theme).  Let’s face it- most unfinished works happen because we either run out of time or get stumped at a particular spot.  Maybe it was too elaborate of an idea to start with.  No matter- looked at with fresh eyes, an answer is usually found and finishing a long-standing problem is doubly satisfying.  

Will we see this finished in the upcoming 
September exchange?

If you would like to share stories about any of your unfinished projects (or ones that have now been completed), please send the information and/or photos to Bonnie Halfpenny. bhalfpen@gmail.com

Monday, June 12, 2023

WORKSHOP PHOTOS & TOOLS

Members who attended our past two workshops have produced some wonderful books and cards that we would like to share. In May, Edge Gerring taught us how to make stilt books. These were wildly popular and members have come up with even more materials to use to create these structures. Here is a sampling of some of their books.

This is the stilt book Edge made while teaching the workshop.

Cheri Aldrich used her eco-dyed papers.

Margaret Beech

Michele Kamprath

Sherril Story

This is the back side of Sherril's book.

Emmy Nelson used her beautiful wet cyanotype prints.

Paper beads, 6 strand waxed linen thread,
& twigs from the garden complete
Emmy's very organic book.


Thank you Edge for introducing us to this great structure!


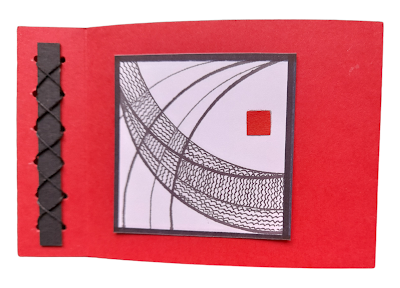
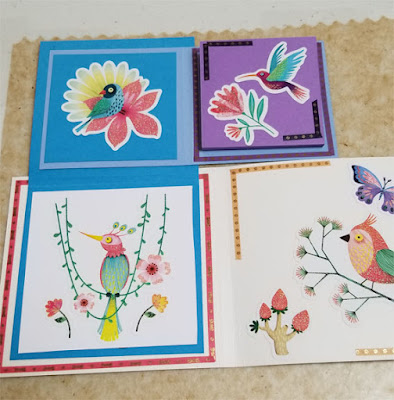
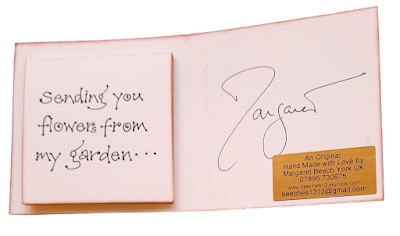
For our June workshop Kenzie Mullen taught us how to make an elegant pop-up card that could be expanded to make a multi-page book. Kenzie learned how to make this structure from one of our Alaskan members, Margo Klass, at the Newport Paper & Book Art Festival. Here are some examples of the cards made at the workshop. 


Beth McIlraith

Sherril Story's card cover

The inside of Sherril's card.

Margaret Beech

Margaret Beech

Mary Conley made a beautiful winter scene card.

Emmy Nelson used a whole sheet of her beautiful
cyanotype paper for her cards.

Emmy has been VERY busy making these gorgeous cards.


Thank you Kenzie for sharing this versatile structure.


This month we will introduce another contributor to this blog. One of our members from Portland, Oregon, Bonnie Halfpenny, will be sharing some of her book art ideas as well as proposing some questions for our readers. 

Everyone has their favorite tools, and I would have a hard time just choosing one.  (When my grandson was young, he couldn't live without his Tigger which doubled as a pacifier).  While I am not as attached to it as he was to his tool, I would often be quite lost without the Dritz Fine Point Disappearing Ink Pen, which is both air and water soluble.  Although made for fabrics, I have used this pen on printer paper, both cold & hot press watercolor, mulberry papers, cardstock, and Unryu and it has evaporated without a trace after a couple of days, or sooner.  Of course, I test it out first on new material, to be sure.  It is sold online and in fabric stores.


What are your favorite tools?  We'd love to know!  Please send your ideas to bhalfpen@gmail.com