North Redwoods Book Arts Guild

If you are interested in more info or joining, please email to no.redwoods.bag@gmail.com

Showing posts with label Edge Gerring. Show all posts

Monday, June 12, 2023

WORKSHOP PHOTOS & TOOLS

Members who attended our past two workshops have produced some wonderful books and cards that we would like to share. In May, Edge Gerring taught us how to make stilt books. These were wildly popular and members have come up with even more materials to use to create these structures. Here is a sampling of some of their books.

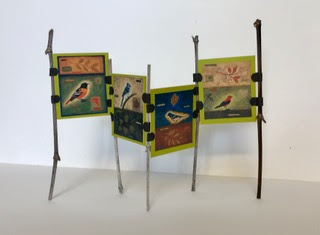
This is the stilt book Edge made while teaching the workshop.

Cheri Aldrich used her eco-dyed papers.

Margaret Beech

Michele Kamprath

Sherril Story

This is the back side of Sherril's book.

Emmy Nelson used her beautiful wet cyanotype prints.

Paper beads, 6 strand waxed linen thread,
& twigs from the garden complete
Emmy's very organic book.


Thank you Edge for introducing us to this great structure!


For our June workshop Kenzie Mullen taught us how to make an elegant pop-up card that could be expanded to make a multi-page book. Kenzie learned how to make this structure from one of our Alaskan members, Margo Klass, at the Newport Paper & Book Art Festival. Here are some examples of the cards made at the workshop. 


Beth McIlraith

Sherril Story's card cover

The inside of Sherril's card.

Margaret Beech

Margaret Beech

Mary Conley made a beautiful winter scene card.

Emmy Nelson used a whole sheet of her beautiful
cyanotype paper for her cards.

Emmy has been VERY busy making these gorgeous cards.


Thank you Kenzie for sharing this versatile structure.


This month we will introduce another contributor to this blog. One of our members from Portland, Oregon, Bonnie Halfpenny, will be sharing some of her book art ideas as well as proposing some questions for our readers. 

Everyone has their favorite tools, and I would have a hard time just choosing one.  (When my grandson was young, he couldn't live without his Tigger which doubled as a pacifier).  While I am not as attached to it as he was to his tool, I would often be quite lost without the Dritz Fine Point Disappearing Ink Pen, which is both air and water soluble.  Although made for fabrics, I have used this pen on printer paper, both cold & hot press watercolor, mulberry papers, cardstock, and Unryu and it has evaporated without a trace after a couple of days, or sooner.  Of course, I test it out first on new material, to be sure.  It is sold online and in fabric stores.


What are your favorite tools?  We'd love to know!  Please send your ideas to bhalfpen@gmail.com


Monday, May 1, 2023

STILT BOOKS

Our May workshop will be taught by Edge Gerring. This will be a very different structure for us, but it should be great fun to make. Edge uses the term, stilt, for books that are mounted on sticks. The sticks, or stilts, can be any material from natural branches, dowels, skewers, popsicle sticks to blown glass, chopsticks, or straws! This class will introduce you to a variety of ways to mount panels on sticks with show and tell presentation. Then we will make a stilt book!

This is the size Stilt Book we will make.

The other photos show different sizes and ways to attach the panels to the stilts.


Tools:

  • PVA (or other white glue) and toothpick
  • Waxed embroidery floss, waxed thread, etc. for tying the panels to the stilts
  • Scissors and awl or very small hole punch (1.0-1.5 mm screw punch)
  • A piece of thick paper to make a hole punching template
  • Pencil
  • A needle with an eye that will accommodate the thread you are using
  • A small weight is helpful, but not required to hold things down while you tie knots
  • Optional: a straight edge and clamps to make a bumper at the edge of your work surface. This is helpful in making sure all the stick bottoms are lined up with each other.

Materials:

  • Four (4) panels of heavy card stock, playing cards or thin cardboard 3-1/2" high by 2-1/2" wide. You can use a larger (or smaller) size, as you wish, square or rectangular
  • Decorate your panels before class, or use them plain and this can be a prototype
  • Five (5) sticks (Edge will be using thin skewers that are 6" long. The length of yours is up to you, but they should be at least 2" longer than the height of your panels.
  • Beads or other decorative stuff if desired


When:
   Saturday May 13 at 10 a.m. PDT

Where:  On your computer, tablet or smartphone via Zoom

RSVP:   To Dolores Guffey by May 8 to receive the password

Workshop Questions: Edge Gerring

Zoom Questions:  Bobbie Hayes

Contact information for everyone is in the newsletter

Friday, November 18, 2022

Arowana and BIMA


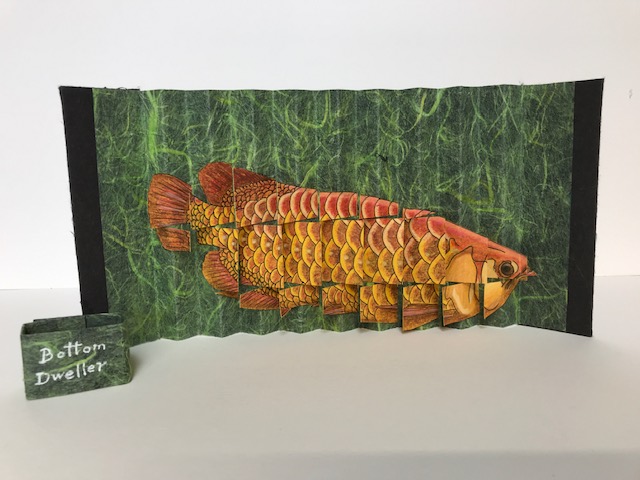
Our November workshop was all about a fish named Arowana. Our instructor, Edge Gerring, was very familiar with Arowana and knew just how to cut Arowana apart and then bring Arowana back together into a very “fluttery” flag book. It was a fun workshop and maybe a little more complicated than other workshops so not everyone completed their structure during the allotted time. So, we only have one example to share and it comes from across the big pond. Many thanks to Edge and to Margaret for sharing.

Margaret Beech (England)


Shapes of Things to Come is the title of the current exhibit in the Sherry Grover Gallery at the Bainbridge Island Museum of Art (BIMA) in Washington. This exhibit will continue until February 15, 2023. Here is the introduction to the exhibit:

"The future of the book is here. These works from the Cynthia Sears Artist's Books Collection bend convention, break tradition, and steer a bold course for the future of artist's books. This exhibition features more than forty local, national, and international artists working in diverse formats, materials, and themes."

Here is a sample of some of the wonderful books on display. 

Transpose, 2021
 Islam Aly (Egypt)


Inside Chance, 2000
 Linda Smith (Arizona)

Socrates, Know Thyself, 1999
Stephen Daiber (Massachusetts)

Old Growth: Beneath the Forest Floor, 2015
Lucia Harrison (Washington)

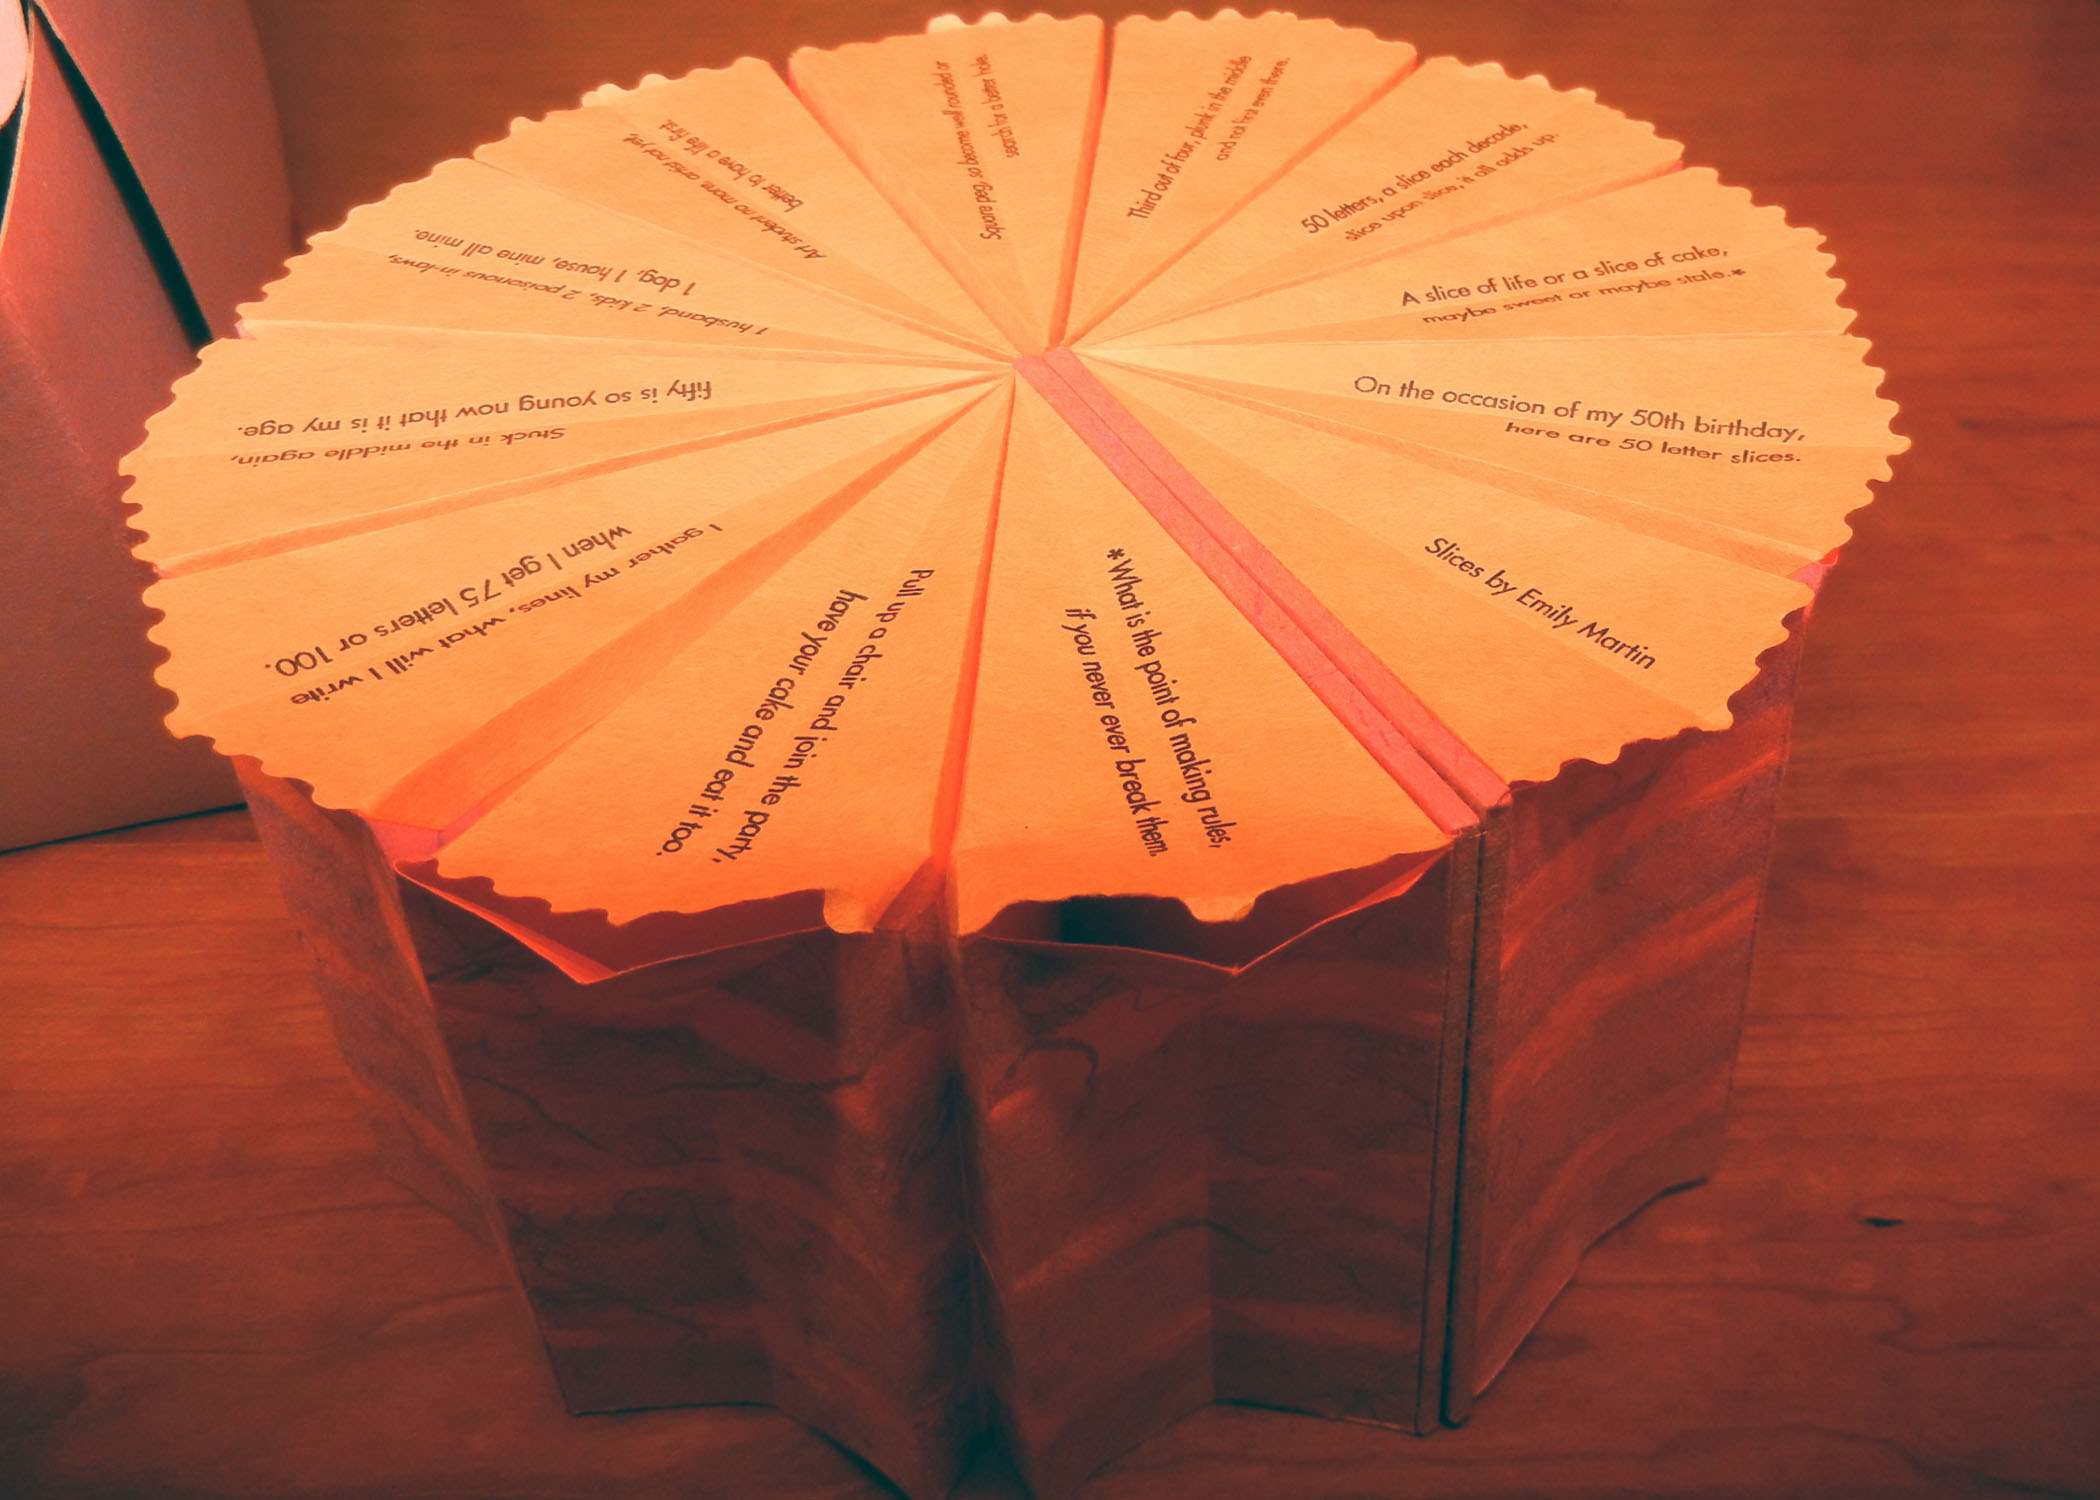
Slices, 2004
Emily Martin, (Iowa)


Take Me, I'm Yours, 2019
Laura Russell (Oregon)

50 Revolutions, 2015
Helen Hiebert (Colorado)

Living With Tassels and Trims, 2019
Robbin Ami Silverberg (New York)

This is the book that goes with the jacket pictured above and 
here is the artist's description of the two pieces:

"I stumbled upon plastic bags filled with samples of textiles, tassels & trim when we were cleaning out my mother’s closets after she died. The remnants found in those bags were pieces of her story: dreams of creating a space and place, a home that defined beauty, projected refinement, and what she would have clarified as happiness.

The result is a cloth book with richly embroidered text & patterns sewn onto a wooden clothing hanger. 
The text focuses on the idea of ritual as movement and movement as reading. Each copy has a unique case made from clothing, which becomes the protection of these words instead of the human body. The viewer must ‘undress’ the book in order to read it."


Sunday, October 30, 2022

SINGLE IMAGE FLAG BOOK

Flag books are very eye-catching and often contain several different images. But they can also be a great structure to use for a large single image. Our November workshop will feature a fish named Arowana and an instructor named Edge Gerring who will show us how to create this single image flag book. Edge will provide an image of Arowana but you can use any image that will fit on the 5" x 11" background.


Materials


Edge will provide:  Instruction sheet and Arowana image
These will be emailed to you upon RSVP.

Participants need:
  • Pencil and metal edged ruler
  • Scissors, cutting knife and mat
  • Bone folder (scoring board and scoring tool are optional)
  • Glue: PVA, Elmer's, Tacky or extra strong glue stick
  • One (1) piece background card stock 5" x 11" grain short - or any paper that will take 1/2" accordion folds well.
  • One (1) copy of Arowana (or your similar sized image) on cardstock
  • Two (2) covers: stiff board 1 1/2" x 5" grain long
  • Two (2) cover papers 3 1/2" x 6"
  • Optional: paper, cord, ribbon, etc. for a belly band
Here are a couple more images to give you an idea of how this structure goes together.


Workshop Meeting Details:


When:   Saturday November 12 at 10 a.m. PST
Where:  On your computer, tablet or smartphone via Zoom
RSVP:    Dolores Guffey by Nov. 7 to receive the password and instructions
Workshop Questions: Edge Gerring
Zoom Questions:  Bobbie Hayes
Contact information for everyone is in the newsletter

Saturday, February 26, 2022

MINIATURE JOURNAL

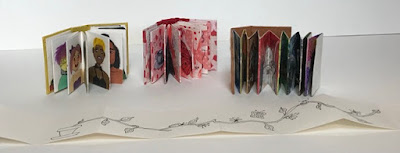
Do miniature books catch your interest and make you smile? If so, you're not alone. There just seems to be something about tiny things that are captivating. At the March NORBAG workshop Edge Gerring will lead us in making a hard cover accordion fold journal in miniature. We will decorate the pages with a wandering vine drawing, or any other image of your choosing. These little books are not only perfect for gifts, the making of them is perfect for soothing jangled nerves and calming harried brains. There will also be a show and tell of several book samples.

Book samples, plus the wandering vine
 that could be used for the accordion fold pages. 

Supplies:

  • Two pieces of 2" x 1-1/2" cardboard (for the covers)
  • One piece of 2" x 1" cardboard (this will be trimmed later for the spine)
  • One piece 3" x 4" of decorative paper for the cover. The 3" is the vertical direction of the cover, so orient paper accordingly.
  • One piece 1-7/8" x 12-1/2" paper (grain short) for the accordion fold page block. A lightweight watercolor paper or 70 lb. (approximately) drawing type paper is good. Use a paper that will take ink without bleed through.
  • Ink pens, fine point black and colors, and/or colored pencils or watercolors
  • Scissors, ruler, glue stick, cutting mat & knife

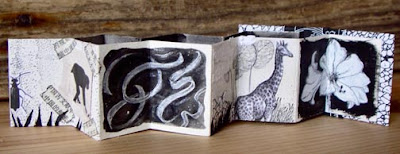
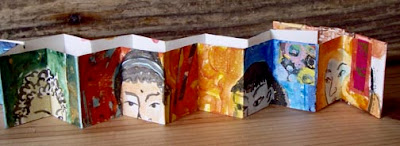
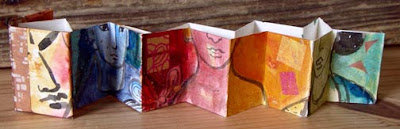
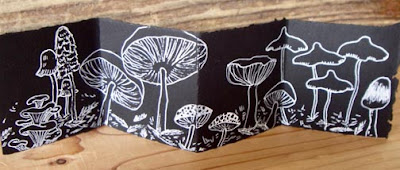
The following examples of miniature books were made by Lynne Gurnee


A book of cartoony dogs painted in gouache on black paper.

Black & white only

"A sheet of 140 lb. watercolor paper that I'd practiced painting faces onto
in black & white, then sliced up the sheet to make a book, letting the
faces occur where they might. Then I added more color, acrylic, and
collage. This book has a separate spine paper. Some books just use one
sheet of paper for cover & spine." 

This is the other half of the book above.

White Gelly Roll 08 pen on black paper

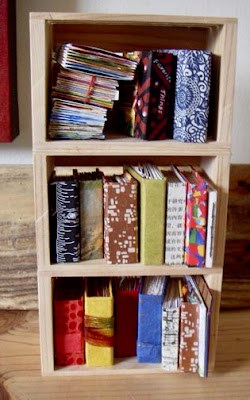
Lynne's great little bookcase for her miniature books.
She found the three little crates at Michaels and glued
 them together. Size is 10" tall by 5" wide by 2.5" deep.

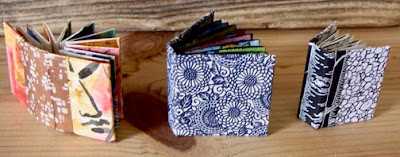
Covers of three of these adorable books

This workshop should be great fun. Thanks in advance to Edge and Lynne for sharing their miniature books.

When:   Saturday, March 12 at 10 am PST
Where:  On Zoom
RSVP:    by Monday, March 7 to Dolores Guffey
Workshop Questions:  Edge Gerring
Tech Questions:  Bobbie Hayes
Contact information for everyone is in the newsletter

Tuesday, September 15, 2020

BOX MAKING & ANNIVERSARY

NORBAG is continuing our monthly workshops thanks to Zoom. Our September workshop was a great success due to the advance planning of our host, Bobbie Hayes, and facilitator, Edge Gerring. Edge led us through each step to make a box with a hinged lid, completely covered with decorative paper. She had provided us with directions and exact measurements ahead of time, so we were ready to begin when the workshop started. The assembly went smoothly since it was well paced from one step to the next. Bobbie did a fantastic job of monitoring the progress by watching participants on the screen to see when most of us lifted our heads to be ready for the next instruction. After we finished the boxes we held them up to the screen so that everyone could see the creative papers that were used. Thank you Edge for taking the fear out of making a box!

Covering the outside of the box

Covering the inside of the box

Attaching the lid

Lid attached

Edge's finished box

Showing our boxes

The September workshop was our fourth Zoom meeting and we've had around 40 members join us each time. While there isn't much good news about the pandemic, the upside is that all of us have the opportunity to gather together once a month regardless of where we live. It has been great fun to see and visit with members from across the country and the “pond” that we've only known by name. Currently 65% of our members live outside of Humboldt County and coincidently about that same percentage represents the out-of-town members who have been joining us on Zoom.  


It doesn’t seem possible that
25 years have slipped away since 15 fellow book arts enthusiasts gathered together to form the North Redwoods Book Arts Guild under the leadership of Shereen LaPlantz. Book art was a relatively new medium in 1995 and Shereen’s book Cover to Cover had just been published. This was one of the first “how-to” books to introduce the wonderful world of book arts to new artists.

Of the original 15 charter members, four are still members today. By the end of our first year we had 48 members. Today we number 160 from 15 different states as well as four international members from Canada and England.

Our monthly newsletter is the real “glue” that holds our guild together. September 2020 will mark the 300th newsletter produced by a team of very dedicated members. Besides this blog we also have a website and Flickr site where we showcase the beautiful exchange books each month.

One activity that has been constant since the beginning is our voluntary book exchange in which members can participate. Themes are suggested by the members and assigned for each month except December and February. In December members sign up in advance to participate in a card exchange where we make an edition of holiday cards, one for each member who signs up. February is always a Valentine theme where we make a single card to exchange.

We have no idea what 2021 will have in store for us, but for now we will try to stay connected through our newsletter, blog, and Zoom meetings. Twenty-Five Years…and still going strong! Here’s to all of us who share a love of book arts!